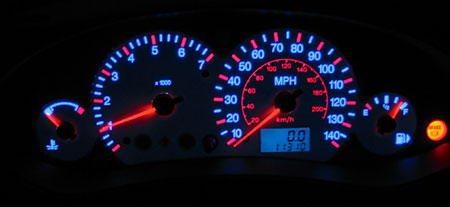
I never liked the green-flavored instrument cluster featured in the Focus, especially after seeing the red and blue gauges in a Jetta. Indiglo gauge faces are a common mod, but when "reverse" indiglos came out, they were red and blue and I picked them up right away. Additionally, the gauges now better match my head unit..
Price: $64.99
Time: 60 minutes
Tools: 7mm Hex wrench, Torx 8 driver, electrical tape, double-sided tape
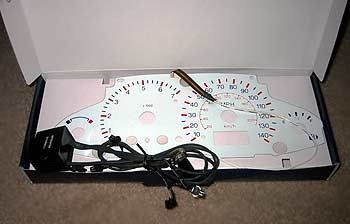
Parts: Indiglo gauge face cover with included inverter and dimmer
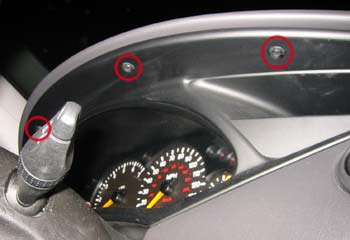
1. Remove the top three 7mm Hex screws from the top of the instrument cluster housing. Pop the housing straight out towards you.
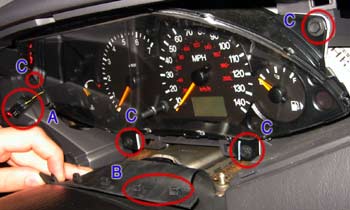
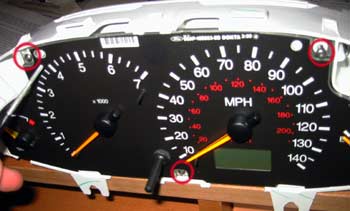
2. Unplug the trunk release wiring harness (A, pictured below). Pull the rubber piece out from under the housing (B). Set the housing aside, and unscrew the four 7mm hex screws around the instrument cluster (C).
3. Pull out the instrument cluster. Disconnect the wiring harness by moving the black locking tab from right to left as pictured. This may take some force, it was easier to push with a screwdriver. Take out the instrument cluster, and remember to keep it upright as silicone could leak from the guages if tilted.

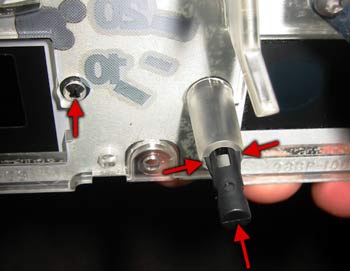
4. Removing the black front of the instrument cluster case from the white back by releasing the four tabs, on top and bottom. Unscrew the three torx screws on the face of the instrument cluster (below). If you do not have a Torx 8 or 9 driver, a small flat head driver should do fine. Pull the face of the guages straight out of the white casing.
5. On the back of the guage face, squeeze the sides of the trip reset button and push it out from the back. Also push out the three needle limiter pegs. It is OK if the needles spin around.
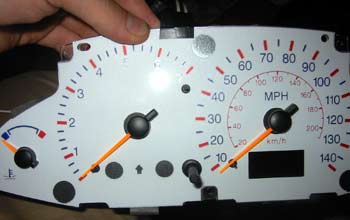
6. Put a piece of electrical tape on the front and back of the wires going into the indiglos to protect them from bending too much. Line up all the needles in the same direction, preferably at the angle that the temperature and gas tank needles rest. Slip the needles into the center holes of the indiglo face. It is thin and flexible so you should be able to do all four at once. Do NOT pop the needles off. Once you are toward the center, you can push the indiglo below the center black plastic of each needle and then get enough to bring it around the back and underneath the needle center. Replace the three limiter pegs and the trip reset button. Now make sure the indiglo face is lined up nicely and insert double-stick scotch tape between it and the face along the edges where needed.
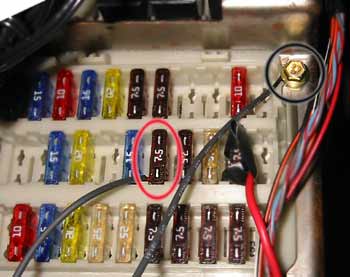
7. Put everything back together and install back in the car, dropping the indiglos' power wire down the left side. Now to hook up the inverter. Remove the fuse panel door, and if you want the entire panel below the steering wheel. Pull out fuse #47 and insert the positive (red) power wire into the bottom socket, and replace the fuse to hold the wire in. Secure the ground (black) wire to a nearby screw.
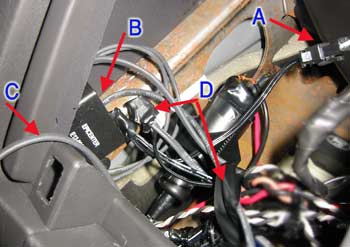
8. Plug the indiglo wire into the inverter's output wire (A). Secure the inverter, I found it fit nicely right in the side (B). I ran the dimmer control out the fuse door to be adjusted later, then closed behind the fuse door (C). Use electrical tape to cover any exposed connectors, and to gather excess wire (D).
9. You should be all set. Turn on the parking lights and verify that the indiglos also illuminate. (If they don't, or are flashing, chances are the connection of the wire right at the indiglo panel is bad. Pull it apart and put some extra layers of electrical tape over it to push it together) Adjust the dimmer to the desired brightness. As soon as you turn the car on the needles may do a full sweep...verify that they are not rubbing on the indiglo face and prevented from moving (if so take it back out and tape it down).
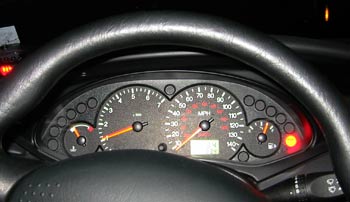
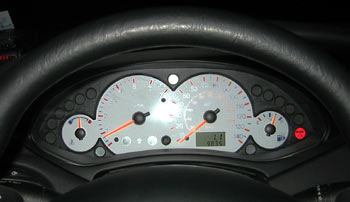
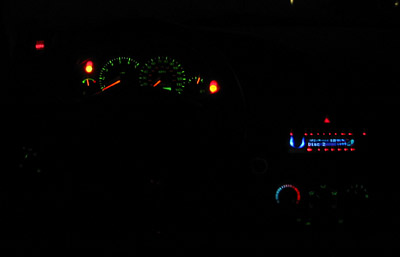
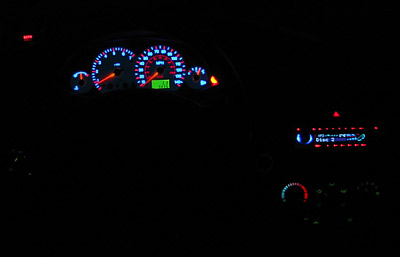
Before & after.