There are a lot of little fine touches on the European Focus models that are not present on the U.S. models, possibly to reduce cost. One of these is sedan taillights; The US taillights are all red and have an oval for the main light, which makes the car look cheap. I can't stand them, especially when they are illuminated. the european ones look, well, european with all rectangular sections and amber signals, and really clean up the rear. Remember most people only see the car from the back!
Price: $175.00
Time: 3 hours
Tools: Soldering iron, wire strippers, razor, wrench
Parts: Ford European Focus sedan taillights, Red 3M Quick Connectors,* wire, Bulbs: 2xP21/5W, 2xR5W,** 4xP21W**
* The euro lights use a different wiring harness, if you can obtain this harness, then you can skip most of the work here!
** The lights have a 4th light on the bottom used for rear fog lights, which are not present in the US taillights. If you want to make them extra brakelights then get P21 bulbs for them and wire them so. I made them into extra parking/running lights and therefore used R5W bulbs. Wal-Mart is a good place to get all the bulbs.
1. Unclip and pull off the back of the euro lights. If you do not have the wiring harness, you will need to solder wires to each of the leads for the bulbs, and I would suggest two or three to ground to support the additional current. You can run the wires to the back through the hole. Just remember to label them or it will be hard to trace them later! The brake light is the righthand lead in BOTH lights. Plug in all the bulbs (push and half turn, P21/5W will only fit one way). You may want to test the connections and bulbs if you have a 12v power supply or battery.

2. Remove the stock taillights: Open the trunk and unscrew the 3 thumbscrews behind each taillight. Pull out the light, and unclip each wire harness, noting which is which (turn, reverse, etc. "Primary" is brake while "secondary" is the parking light).
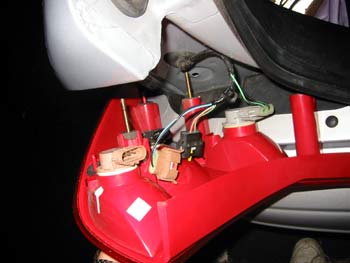
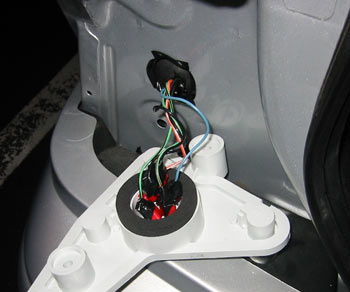
3. Remove the electrical tape surrounding the wires. Cut off as much of the grommet as possible, and push it into the hole. Surround the edge of the hole with electrical tape to protect the wires from being sliced by it. Now for the point of no return! Cut the wires to an equal length. Now for the hardest part. All wire and connections must be made in the circular part of the back of the euro taillights as it seals to the metal. Use the quickclips to splice togeather each set of wires, again taking extra care to get them as far inside the tailight as possible. Squeeze them good and hard, I had to go back many times after testing as some lights didn't work and the connects weren't making the connection. Here's what it looks like:
4. Twist the tailight so the wires coil and push them into the hole when attaching the taillight. Screw it in tight so all the seals are in fact sealed, while making sure not to pinch any of the wires or connectors. Test all the lights to make sure they work (parking, brake, turn, reverse...a friend is useful for this part!). I had a lot that didn't so make some time for this!
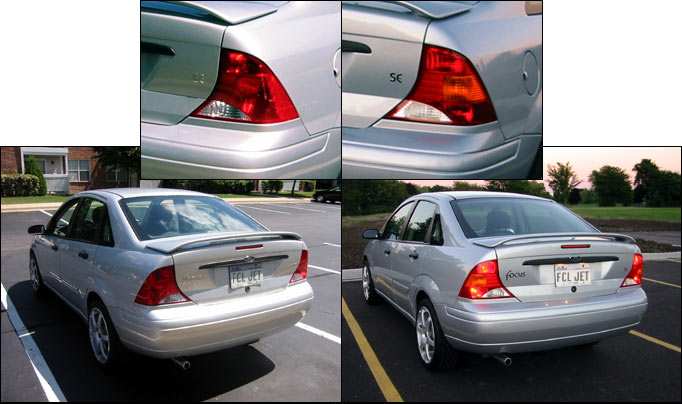
Before & after